Join together a square tote bag
Instructions on how to join up a granny square tote bag with different sized squares
35% Raverly Sale
About This Pattern
This quick image tutorial on connecting the large and small granny squares for a squares crochet tote pattern.
This pattern can be applied to all the linked patterns below, so if the actual crochet squares do not look exactly like the pattern you are working on, don't panic as the joining process is the same for all these bags, only the pattern for the actual square patterns will be different and set out per each pattern.
Get the AD FREE PDF Crochet Pattern
Materials & Tools
| Hook | |
|---|---|
| Yarn Weight | |
| Fibre Type |
Pattern Instructions
Written Instructions
Make 10 small squares and 2 large squares.
Start with 8 x small squares and 1 x large square as per the image below, to see detailed information about placement see the figure below photo.

Layout crochet squares of flat surface
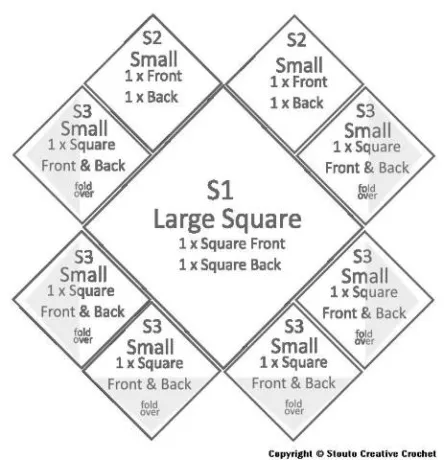
Square placement for the front of the bag
- S1: 1 x Large Square for front
- S2: 2 x Top Small squares for the front
- S3: 6 x SideSmall squares for front and back
Square placement for the back of the bag
- S1: 1 x Large Square for the back
- S2: 2 x Top Small squares for the back
- S3: same squares folded over and used for back

Step by Step
⚠️ This pattern is for personal use only. Please do not copy or redistribute.
Join squares in the following order
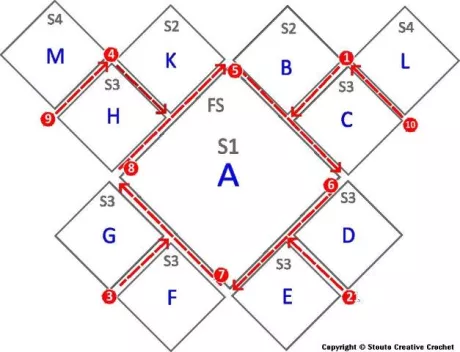
Red number corresponds with the instructions below, the red arrow indicated in which direction to join.
Start with joining small squares together,
Join Square B to C,
Join Square D to E,
Join Square G to F,
Join Square H to K,

Place two squares on top of one another, right side facing in.

Join yarn into both squares, with a slip stitch, 1 single crochet stitch over slip stitch to secure yarn. Work 1 single crochet stitch from the corner space into each stitch of both crochet squares.
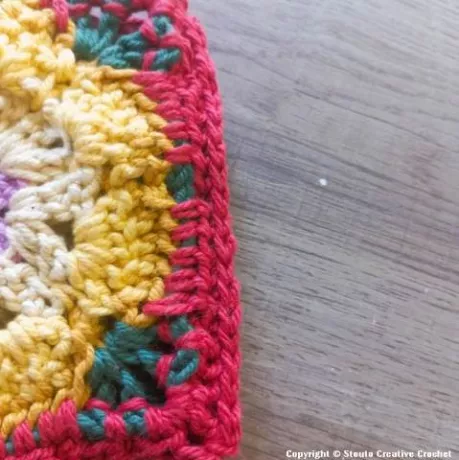
If you are more comfortable using a yarn needle and yarn you can join squares with a simple needle work stitch.
Join 2 squares on a single side, then finish off the yarn.

Join joined squares (B+C) to square A
Join joined squares (D+E) to square A
Join joined squares (G+F) to square A
Join joined squares (H+K) to square A

Join Square M to H,
Join Square L to C,
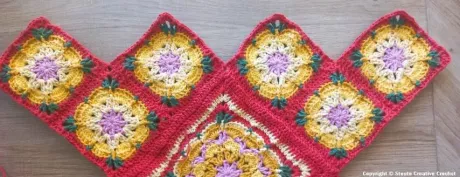
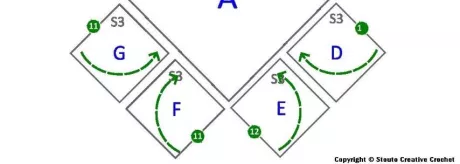
Fold the following squares inwards, and join only side indicated in points 11 and 12 as indicated below.
Fold over squares G and F, join sides marked with green 11
Fold over squares G and F, join sides marked with green 11
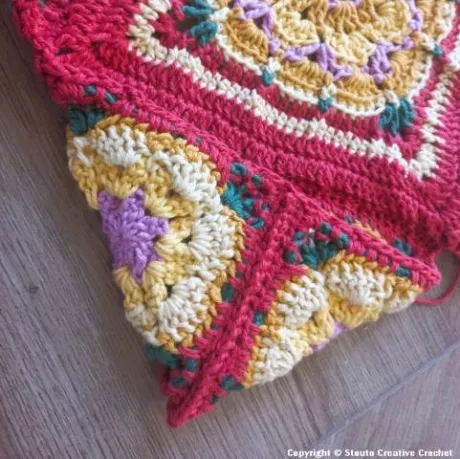
Turn the work inside out, fold over squares and place required squares on top of one another, right side facing in.
Join yarn into both squares, with a slip stitch, 1 single crochet stitch over slip stitch to secure yarn. Work 1 single crochet stitch from the corner space into each stitch of both crochet squares.

If you are more comfortable using a yarn needle and yarn you can join squares with a simple needle work stitch.
Join 2 squares on a single side, then finish off the yarn.
Fold the following squares inwards, and join only side indicated in points 11 and 12 as indicated below.

Fold over square M to lay flat on the right side facing inwards on top of square K, dont join
Fold over square B to lay flat on the right side facing inwards on top of square L, dont join.

The shape of the bag will now be visible.
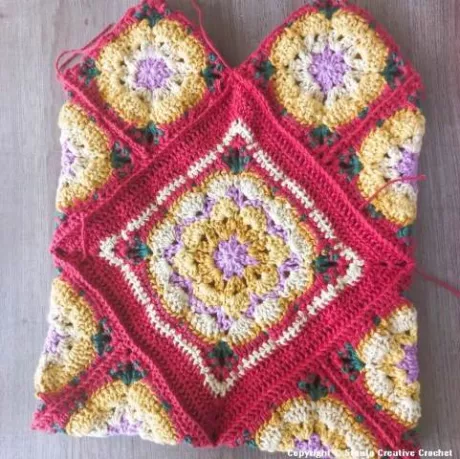
Join the remainder large square in the same manner as points 5 to 8 mentioned above work in ends.

Turn the bag inside out, the base of your bag is now complete. Let's move on to making the straps and finishing the bag.
What Other Crocheters Say
This pattern hasn’t been reviewed yet.
Be the first to share your experience and help other crocheters.
Made it work? Share your result
Pattern Copyright & Usage
This crochet pattern and all associated content are the original work of Stouto Crochet.
- ✔️ Personal use allowed
- ✔️ Sell finished handmade items (small-scale)
- ❌ Do not copy, rewrite, or redistribute
- ❌ Do not share or resell PDF patterns
AI & Content Use: This pattern may not be reproduced or used to train AI systems.
Explore More Crochet Tutorials on the Website
If you need extra help while working on your stitch sampler blanket, you can explore the crochet tutorials section on the website. These guides explain crochet stitches, techniques, and pattern methods in a clear and beginner-friendly way.
You’ll find helpful stitch tutorials, visual diagrams, and step-by-step guides that make it easier to learn new stitches and improve your crochet skills while completing your project.
Crochet Pattern FAQ
Explore More Popular Crochet Patterns You’ll Love
If you enjoyed this pattern, be sure to explore some of our other most-loved crochet designs.
From textured granny squares and patchwork flower motifs to beginner-friendly blankets and statement afghans, each pattern is created with clear instructions, step-by-step guidance, and practical yarn details to help you crochet with confidence.
Whether you're building a full blanket collection, creating a thoughtful handmade gift, or simply looking for your next relaxing project, you’ll find plenty of inspiration across our popular pattern pages.
Take a look around and discover your next favourite crochet project.
You will find the full list of crochet patterns on the Crochet pattern collection page.
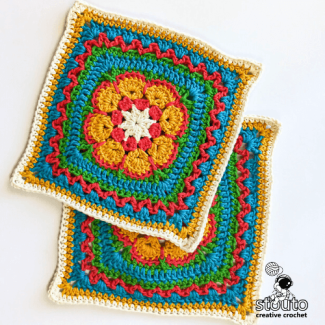
8 Petal African Flower Crochet Pattern – Easy 9 Inch Large Square
Looking for an 8 petal African flower crochet pattern that’s both eye-catching and easy to make?
This design transforms the classic African flower motif into a large 9-inch square, making it ideal for blankets, afghans, cushion covers, and statement crochet projects.
With clear stitch rounds and strong petal definition, this African flower square works up beautifully in solid colors, bold contrasts, or scrap yarn combinations. Whether you’re a confident beginner or an experienced crocheter, this pattern is designed to be enjoyable, flexible, and visually striking.
