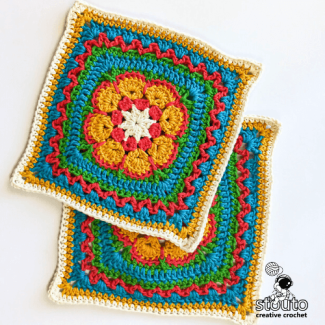
1. Insert hook under the back loop only (farthest from you).
2. Complete the stitch as normal.
BLO - Back Loop Only Step-by-Step Instructions (US Terms)
1. Begin with any foundation row of stitches (for example, single crochet).

2. When starting your next row, chain 1 (for single crochet) or the turning chain required for your stitch.
3. Look at the top of your stitches, you’ll see two loops: the front loop and the back loop.

4. Insert your hook only under the back loop (the one furthest from you).

5. Complete your stitch as usual, for example, yarn over, pull up a loop, and finish a single crochet.
6. Continue working across the row, inserting your hook in the back loop of each stitch.
UK Terms:
In UK terminology, the technique is also called Back Loop Only (BLO).
The only difference is in the base stitch name (e.g., single crochet = double crochet in UK terms).
Practice Swatch Exercise:
Materials: Medium-weight yarn and a size H/5.0 mm hook.
1. Foundation Row: Chain 16.
2. Row 1: Work 1 single crochet (SC) in the 2nd chain from the hook and in each chain across. Turn.
3. Row 2: Chain 1, work 1 SC in the back loop only of each stitch across. Turn.
4. Repeat Row 2 for 6–8 rows.
5. Observe how the fabric develops a ribbed, flexible texture.
Tip for beginners :
If you want to create a thicker ribbed effect, try using half double crochet (HDC) or double crochet (DC) stitches in the back loop only, the taller stitches make the ridges more defined.
Once you’re comfortable with BLO, try combining it with Front Loop Only (FLO) stitches in the same project to create alternating textures and visual depth, a great next step in your crochet journey.
Back Loop Only (BLO) - Step-by-Step Crochet Instructions (sc, hdc, dc)
BLO stitches are a simple trick that instantly adds texture and a neat ridge to your work. Below are clear, beginner-friendly step-by-step instructions for Back Loop Only single crochet (BLO sc), BLO half double crochet (BLO hdc), and BLO double crochet (BLO dc) in US terms, with UK equivalents, tips, common mistakes, and a short swatch exercise.
Quick notes & abbreviations
- US → UK equivalents shown where relevant.
- ch = chain, st = stitch, sk = skip, BLO = back loop only, FLO = front loop only, sl st = slip stitch.
- US sc = UK dc, US hdc = UK htr, US dc = UK tr.
- Suggested yarn/hook: worsted weight (#4) yarn and 4.0–5.5 mm hook (adjust for gauge).
1) BLO single crochet (BLO sc) — US / (UK: BLO double crochet)

What it looks/feels like
Creates a row of horizontal ridges on the fabric’s front (or back, depending on working side). The fabric is a little more flexible and textured than regular sc.
Step-by-step (US)
- Make a foundation chain (for practice chain 12).
- Row 1: Insert hook into 2nd chain from hook, yarn over (yo) and pull up a loop, yo and pull through both loops — regular sc across the chain. Turn.
- Row 2 (BLO row): Ch 1 (does not count as st). Insert hook only into the back loop of the first stitch (you’ll see two loops across the top of the stitch — work into the loop farthest from you). Yarn over, pull up a loop, yo and pull through both loops — that’s one BLO sc.
- Repeat BLO sc across the row in each stitch’s back loop only. Turn.
- Continue working BLO sc rows as needed.

Tips
- Look for the two loops on top of the stitch; the back loop is the one furthest from you.
- Ch 1 at the beginning keeps edge tidy.
- The unworked front loops form a ridge on the right side — great for ribbing.
Common mistakes
- Accidentally working into both loops (you’ll lose the ridge).
- Working into the front loop instead of back loop.
- Pulling too tight — makes ridges flat.
Found this helpful?
Share it with a friend or save it for your next crochet session!

2) BLO half double crochet (BLO hdc) — US / (UK: BLO half treble (htr))
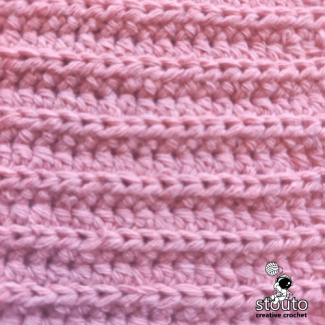
What it looks/feels like
Gives a slightly taller textured fabric than BLO sc with more drape — useful for garments and blankets that need a bit more height.
Step-by-step (US)
- Foundation chain (chain 12 for a sample).
- Row 1: Work a regular row of hdc across (ch 2 to start if pattern requires). Turn.
- Row 2 (BLO hdc): Ch 2 (counts as start if you prefer), yo, insert hook into the back loop only of the next stitch, yo and pull up a loop (3 loops on hook), yo and pull through all 3 loops. Repeat across row. Turn.
- Continue BLO hdc rows as needed.

Tips
- Use ch-2 at row start to match stitch height and keep edges even (or ch1 and work first stitch in back loop if preferred).
- The BLO gives a soft rib that’s less firm than sc ridges.
Common mistakes
- Forgetting to yo before inserting — you’ll create a sc instead of hdc.
- Pulling up loop inconsistently — uneven stitch height.
Found this helpful?
Share it with a friend or save it for your next crochet session!

3) BLO double crochet (BLO dc) — US / (UK: BLO treble (tr))

What it looks/feels like
Tallest of the three — BLO dc creates prominent ridges and an airy fabric with more drape. Great for lacy rib panels or dramatic texture.
Step-by-step (US)
- Foundation chain (chain 12 for sample).
- Row 1: Work a regular row of dc across (ch 3 to start if pattern standard). Turn.
- Row 2 (BLO dc): Ch 3 (or ch 2 if you want slightly lower edge), yo, insert hook into the back loop only of next stitch, yo and pull up a loop (3 loops on hook), yo and pull through 2 loops (keeping 2 on hook), yo and pull through remaining 2 loops. Repeat across row. Turn.
- Continue BLO dc rows as needed.

Tips
- Use the starting chains or an alternative start (ch less + first stitch in back loop) to keep edges tidy.
- BLO dc creates a pronounced vertical/ribbed texture when worked in alternating rows.
Common mistakes
- Not finishing the dc correctly (missing a yo or pulling through wrong number of loops).
- Working into both loops — no ridge forms.

Found this helpful?
Share it with a friend or save it for your next crochet session!
Visual reference (simple stitch chart in words)
- Regular stitch top = two loops: [front loop] [back loop]
- BLO = work into [back loop] only → front loop remains unworked and forms the ridge.
Fabric behavior & where to use each
- BLO sc: dense, stable ribbing - good for cuffs, edgings, placemats.
- BLO hdc: medium drape, softer ribs - good for garments and blankets.
- BLO dc: airy with strong texture - good for shawls, scarves, decorative panels.
Variations & combos
- Alternate BLO and regular rows for mixed texture.
- BLO ribbing: work BLO sc in one row and BLO sc in next, or work BLO sc on every row for a knitted-look rib.
- Front loop only (FLO) is the mirror effect — useful combined with BLO for deep ribs.
Troubleshooting quick checklist
- If no ridge appears → you likely worked into both loops.
- If edge starts to slope → check skipped or extra stitches at row ends. Consider turning chain height (ch 1 / ch 2 / ch 3) matching stitch height.
- Ridges flatten → loosen tension slightly on the loop you insert into.
Want this as a printable one-page cheat sheet (PDF) or an HTML snippet with code you can paste into your blog? I can create that next.
Measure fabric difference, note drape and density.