
Tips for Creating Crochet Stitch Sampler Blankets
Crochet stitch sampler blankets are one of the most enjoyable projects for crocheters of all skill levels. These blankets combine many different stitch patterns in a single project, allowing you to learn new techniques while creating a beautiful textured blanket.
This guide was created to support my stitch sampler crochet patterns and help crocheters understand how sampler blankets work. Whether you are learning new stitches, adjusting the blanket size, or choosing the best yarn, this page provides practical tips to help you crochet your project with confidence.
If you arrived here from Pinterest while searching for crochet stitch sampler blanket tips, you are in the right place. Bookmark this page because it is regularly updated with tutorials and guidance for mixed stitch crochet projects.
35% Raverly Sale
Crochet Stitch Sampler Patterns this quide provides help for :

My Original Striped Crochet Stitch Sampler Blanket Pattern
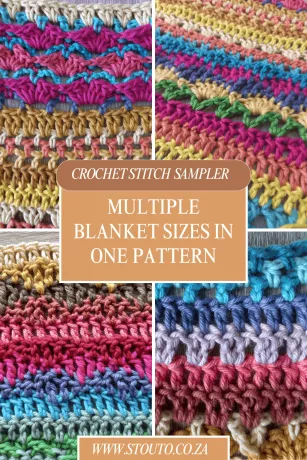
My Ultimate Crochet Stitches Sampler
Include 210 Rows and Multiple Blanket Sizes in one Pattern

Shabby chic boho style crochet poncho pattern
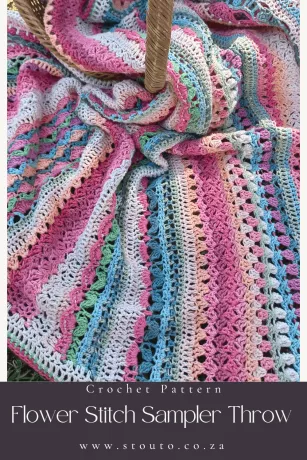
How to navigate a crochet stitch sampler project
- What Is a Crochet Stitch Sampler?
- Starting a Stitch Sampler Project
- Tips for Crocheting Stitch Sampler Blankets
- How to Read Stitch Diagrams
- Best Yarn for Stitch Sampler Projects
- Best Yarn Weight for Stitch Sampler Blankets
- Best Crochet hook for Stitch Sampler Projects
- Beginner Tips for Choosing Color Combinations
- How to Change Colors in Crochet
- Step-by-Step: Starting a New Color for Each Row
- How to Add a New Ball of Yarn
- Resizing guide
- Using Scrap Yarn for Crochet Projects
- How to Resize a Stitch Sampler Blanket
- How to shorten or lengthen your blanket
- Step by step Resizing guide
- Blanket Resizing for Yarn Weight & Hook Size
- Additional Notes for Stitch Sampler Blankets
- What do I need to know before making my starting chain
- Starting Chain and Starting Row Tips
- Foundation Row Tips
- Step by Step: Foundation Row
- Crochet Stitch Sampler Bags
- Crochet Stitch Sampler Ponchos
- Crochet Stitch Sampler Scarves
- Crochet Stitch Sampler Pattern Collection
- Common Questions About Stitch Sampler Blankets
What Is a Crochet Stitch Sampler Blanket?
A crochet stitch sampler blanket is a project that combines many different crochet stitches within one blanket design. Each section of the blanket features a different stitch pattern, creating texture and visual interest across the project.
Stitch sampler blankets are popular learning projects because they allow crocheters to practice multiple crochet stitches while completing one finished item.
Thank you to everyone who has supported our crochet patterns. If you have already purchased one of our stitch sampler blanket patterns, we hope you are enjoying the process of learning new stitches and creating something beautiful. If you are still deciding on your next crochet project, we’re excited to help inspire your next handmade creation.
Starting a Crochet Stitch Sampler Project: Tips and Steps
Crochet stitch sampler blankets and projects are wonderful for learning new crochet stitches while creating a beautiful finished item. Before starting your project, taking a few preparation steps will help ensure your stitch sampler turns out the way you expect.
Follow these tips and steps to prepare for a successful stitch sampler crochet project.
- Read the Pattern Notes
Begin by reading through the pattern notes carefully. These notes often contain important information about stitch repeats, special stitches, color changes, and sizing instructions. - Gather Your Materials
Make sure you have all the required materials ready before starting your project. This usually includes yarn, a crochet hook, scissors, a yarn needle, and stitch markers if needed. - Choose and Prepare Your Yarn
Select yarn that highlights stitch definition so the different stitch patterns are easy to see. If you are using multiple colors or scrap yarn, arrange the yarn colors in the order you would like to use them. - Determine Your Project Size
Decide on the finished size of your blanket or project before starting. If the pattern includes resizing instructions, take note of the stitch multiples needed to adjust the width. - Check Gauge (If Provided)
Some stitch sampler projects include gauge information. Making a small swatch can help ensure your blanket will reach the intended size. - Learn How to Read Stitch Diagrams
Many stitch sampler patterns include stitch diagrams to visually represent the rows. These diagrams make it easier to understand complex stitch patterns and follow the structure of each section. - Create the Starting Chain
Make the starting chain according to the pattern instructions. Be sure the chain count matches the stitch repeat requirements. - Work the Foundation Row
After creating the chain, crochet the foundation row as instructed in the pattern. This row prepares the stitches for the first stitch pattern section. - Check the Stitch Count
Before continuing, count your stitches carefully to make sure the row matches the pattern stitch count. - Begin the First Stitch Pattern Row
Once your foundation row is complete and the stitch count is correct, begin working the first stitch pattern in the sampler sequence. - Use Stitch Markers if Needed
Stitch markers can help identify pattern repeats or keep track of important stitches in more complex sections. - Enjoy the Process
Stitch sampler projects are designed to help you learn and explore different crochet stitches. Take your time and enjoy watching the textures build row by row. - Follow the Finishing Instructions
When you reach the end of the pattern, complete the finishing instructions such as adding borders, weaving in ends, or blocking your project. - Enjoy Your Finished Stitch Sampler Blanket
Take a moment to appreciate the textures, colors, and stitches you have created throughout the project. - Share Your Finished Project
Sharing your finished crochet project with the crochet community can inspire others. Consider sharing photos of your stitch sampler blanket on social media or with other crocheters. - ↑ Back to top
Tips for Crocheting Stitch Sampler Blankets
- Keep consistent tension throughout the project.
- Use the same crochet hook size across the blanket.
- Count stitches at the end of every row.
- Use stitch markers to track pattern repeats.
- Check stitch diagrams alongside written instructions
How to Read Stitch Diagrams
Many stitch sampler patterns include stitch diagrams to visually represent the pattern instructions. Crochet charts help you see stitch placement, pattern repeats, and row structure more clearly than written instructions alone.
Learning to read stitch diagrams can make complex stitch patterns much easier to understand and follow.

Example pattern : written instruction along side diagrams
Don’t be intimidated by stitch charts, they’re actually simple once you get used to them! The diagrams are meant to be used in conjunction with the written text, helping you connect the symbols with the stitch names and steps described in the pattern.
Using a diagram allows you to quickly visualize your next steps and the layout of upcoming rows without needing to pause for long, endless YouTube tutorials. With a little practice, you’ll find that these diagrams make it much easier to see how the stitches come together, turning visual learning into a fun and stress-free part of your crochet journey.
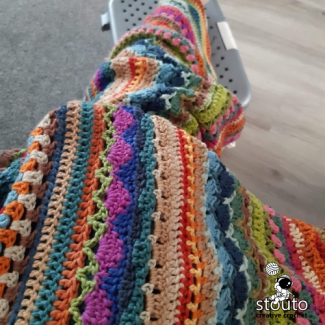
Best Yarn for Stitch Sampler Projects
Choosing the right yarn for a stitch sampler project helps highlight the texture of each stitch pattern. Soft yarns with good stitch definition work best for sampler blankets and textured crochet projects.
- Choose yarn with good stitch definition
- Select yarn that is soft and durable
- Use machine washable yarn for blankets
- Choose yarn brands that offer many colors

What type of yarn is best for a crochet stitch sampler blanket ?
- Choose yarn you love - Pick a yarn you enjoy working with, both in texture and color. The beauty of a stitch sampler blanket is making it your own, not copying exact yarns or color sequences.
- Focus on softness and durability - Select a yarn that feels soft to the touch, holds up well over time, and is machine washable for easy care.
- Use easily available yarn - Go for a yarn brand that’s easy to find and offers a wide color range, especially since sampler blankets often use multiple shades.
- Think stash buster - Stitch sampler blankets are perfect for using up leftover yarn. Choose a type you can easily restock if you run out of a favorite color.
- Stay within your budget - There are many affordable yarns that are soft, durable, and colorful, no need to overspend to create a stunning blanket.
- Match yarn weight and texture to your goal - Consider whether you want a light, airy blanket or a warm, chunky one, and choose the yarn weight accordingly.
Which yarn weight is best for a crochet stitch sampler blanket ?
The best yarn weight for crochet stitch sampler blankets typically depends on the type of blanket you want to create. Here are some common yarn weights and what they’re best for:
- Worsted Weight (Medium, 4) - By fart the most popular yarn weight for crochet blankets. It strikes a good balance between thickness and ease of use. It works up quickly and creates a blanket that’s warm but not too heavy. Most standard blanket patterns use worsted weight yarn.
- Bulky (Weight 5) - If you're looking for a thick, cozy, and warm blanket, bulky yarn is a great choice. It works up very quickly, which is great for large projects. However, the final blanket will be heavier and thicker.
- Aran (Light Worsted, Weight 4) - Aran weight yarn is very similar to worsted but is a little thicker. It creates a denser, warmer fabric, making it a good option for winter blankets.
- DK (Double Knit, Weight 3) - My personal favorite :) Double knit yarn is great for when you want a lighter, drapey blanket that’s perfect for warmer climates, DK weight yarn works well. It’s not too heavy, so it creates a softer, more delicate texture compared to heavier yarns. I live in a warmer climate, where there might have cold spells 3 to 5 months of the year, so using a light weight yarn for me helps me make items that can be used all year round.
- Super Bulky (Weight 6) - This weight is for those looking for a thick, plush blanket that works up extremely fast. It’s great for blankets that are meant to be extra cozy and warm, but it can be a bit stiff for some types of designs. Also note that when using bulky yarn you will need to make a size swatch beforehand, as you don't want to end up with an overly large blanket or project.
- For most crochet blankets, worsted weight (4) is the go-to choice because of its versatility, ease of use, and balanced feel. If you want something quicker and extra cozy, you might choose bulky (5) or super bulky (6). If you're looking for something lighter, DK (3) would be ideal.
- It's always best to make a size swatch before you create your blanket to ensure you end up with the correct size you want to make.
- Make sure you check the pattern notes on which patterns include resizing information, especially if you know that you won't use the yarn specified in the pattern.
Best Crochet Hook for Your Stitch Sampler Blanket
- Whichever yarn weight you end up using, always use the recommended crochet hook suggested on the yarn label.
- When using a more lightweight yarn and a smaller hook, the project or blanket size will be overall smaller, and using a heavier yarn and larger hook, the final project will overall be larger.
- Ensure that you always have a relaxed tension when working a stitch sampler blanket, to ensure the result is soft and flowy.
- I would strongly suggest sticking to the same hook and yarn across all rows of the pattern changing hooks or yarn weight between rows will change the gauge and tension of the blanket.


Beginner Tips for Choosing Crochet Color Combinations
- Start with three to five colors.
- Add one neutral color to balance the design.
- Try gradient or rainbow color palettes.
- Use self-striping yarn for easy color variation.
How to Add a New Ball of Yarn
- Work the stitch until two loops remain.
- Drop the old yarn.
- Place the new yarn over the hook.
- Pull through to finish the stitch.
- Continue crocheting with the new yarn.
Using Scrap Yarn for Crochet Projects
Stitch sampler blankets are perfect for using leftover yarn from other projects. Changing colors between rows allows you to incorporate many small yarn amounts into one colorful project.
Explore more ideas on the Scrap Yarn Crochet Project Hub.
Step-by-Step: Starting a New Color for Each Row
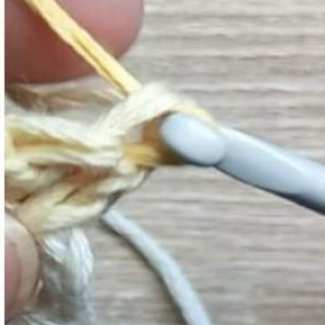
Start with a slip stitch:
Join your new color into the top stitch space of the last stitch worked from the previous row using a slip stitch (sl st).
Secure the join: Push the hook through the loop, yarn over, pull through the loop, then yarn over again and pull through both loops (this completes the slip stitch).

Add a single crochet to lock the yarn:
Work 1 single crochet (sc) over the slip stitch to secure your new color in place.

Create your starting chain:
Chain the number of stitches required by your pattern.
Example:
- Chain 2 (ch 2) if the row begins with half double crochet (hdc).
- Chain 3 (ch 3) if the row begins with double crochet (dc).
Begin working your next row:
After chaining, continue with the stitches as instructed for the new row.

Quick tip for row direction:
Always start your new row on the same side as the yarn tail from the previous row. When you turn your work, the ending tail should sit on your right side while you crochet toward your left. This keeps your row direction consistent and easy to follow.
How to Resize a Stitch Sampler Blanket
- Add stitch repeats to increase blanket width.
- Remove repeats to make the blanket narrower.
- Repeat stitch sections to add length.
- Stop at simple rows to shorten the blanket.
Tips for Beginners
- Always swatch in pattern stitches, not just dc or sc.
- Write down your gauge (stitches and rows per inch/cm) for future reference.
- Check proportions as you go to avoid distortion.
How Do I Lengthen or Shorten a Crochet Stitch Sampler Blanket?
-
Follow the size guide:
- Use the row instructions provided for your desired blanket size whenever available.
-
Repeat the pattern for more length:
- If resizing details aren’t included, simply repeat the stitch pattern sequence from the beginning to make your blanket longer.
-
Stop at simple stitch sections:
- To shorten the blanket, continue following the pattern until you reach a section with consecutive rows of double crochet or half double crochet stitches, then finish with one final row of half double crochet.
-
Consider border options:
- When adjusting the length, choose a simple border instead of a detailed one, as row count changes can affect how decorative borders fit.
-
Check proportions:
- Keep in mind that altering the number of rows may slightly change the overall look and balance of your sampler design.
- Find step by step instructions below.
Blanket Resizing Guide
Adding or Removing Stitches
- Keep the stitch pattern in uneven sets of stitch repeat mentioned for each pattern for balance and texture.
- Always add or remove stitches in uneven multiples of stitch repeat to maintain the pattern’s symmetry.
- Include 1 straight stitch on each edge to keep borders neat, follow pattern notes
- Test a small swatch (2–3 repeats) before starting your full blanket to ensure your adjustments look correct.
Key Notes for Beginners
- The pattern works in uneven stitch sets (multiples listed per pattern).
- Always check your gauge before beginning your blanket.
- Measure 10–20 stitches in your chosen stitch pattern to estimate your finished size.
- After resizing, double-check that your stitch repeats still form an odd number to keep the layout balanced.
How to Adjust Your Pattern
- Count your pattern repeats:
- The stitch sampler uses odd-numbered repeats for symmetry.
- Modify your foundation chain:
- Add or remove sets of 2 × set of stitch repeats to adjust width.
- Check your edges:
- Keep 1 straight stitch at both ends for tidy sides.
- Work a test swatch:
- Always test the pattern texture before committing to a full blanket.
- Extra Tips for Even Edges
- Shells or clusters:
- When adding stitches, watch for half stitches at the edges to keep rows aligned.
- Row sets:
- If repeating rows, note whether they occur in even or uneven sets and stay consistent.
- V-stitches:
- Keep the last edge stitch consistent (usually a dc) to prevent uneven sides.
- Post stitches:
- Maintain correct front-post/back-post alignment when resizing.
Blanket Resizing for Yarn Weight & Hook Size
- Keep stitches in uneven sets of stitch repeats.
- Stitch counts may vary based on your tension.
- You may need to repeat rows to reach desired length.
- The pattern direction goes left to right, based on standard blanket width.
Changing your yarn or hook size affects the blanket’s final measurements.
1. Gauge Matters
- Gauge = number of stitches and rows per inch/cm.
- Example:
- DK yarn, 4mm hook → 20 sts × 25 rows = 10cm × 10cm
- Worsted yarn, 5mm hook → 16 sts × 22 rows = 10cm × 10cm
2. Effect of Hook Size
- Larger hook → bigger stitches → fewer stitches needed.
- Smaller hook → smaller stitches → more stitches needed.
3. Effect of Yarn Weight
- Heavier yarn (chunky/aran) → larger stitches → fewer chains & rows.
- Lighter yarn (sport/fingering) → smaller stitches → more chains & rows.
Step-by-Step Resizing Guide
- Step 1: Measure Your Gauge
- Crochet a 10×10 cm (4×4 in) swatch.
- Count stitches per inch/cm (width) and rows per inch/cm (height).
- Step 2: Calculate New Starting Chain
- Decide your desired width.
- Multiply width × stitches per inch/cm.
- Round result to the nearest uneven multiple of stitch repeats, then add 2 edge stitches.
- Example:
- Desired width = 50”
- Gauge = 3.5 sts/in → 50 × 3.5 = 175 sts
- Adjust to 181 sts (odd multiple of 12) + 2 edge stitches = **183 starting chain.
- Step 3: Calculate New Row Count (Length)
- Multiply desired length × rows per inch/cm.
- Round to nearest multiple of your pattern repeat (e.g., 15-row set).
- Add or remove rows of dc, hdc, or sc as needed to fit your desired length.
- Step 4: Edge Adjustments
- Keep starting and ending stitches the same for straight edges.
- If the final row count doesn’t align, add or remove basic stitch rows.
- For longer blankets, repeat pattern sections that begin with the same first-row stitch.
Additional Notes for Stitch Sampler Blankets
- Finish off color:
- Cut yarn and pull through the last loop.
- Continuing with the same color:
- Chain 1 and turn; chain 2 instead of 3 in the next section.
- Starting a new row:
- Join new color with a slip stitch, then chain the required number to count as the first stitch.
- End stitch alignment:
- Ensure your last stitch equals the starting stitch chain.
- Row direction tip:
- Always begin new rows on top of the previous row’s tail. When turned, the tail sits on your right while working left.
- Finish each color row:
- Cut yarn and pull through the final loop to secure.
What do I need to know before making my starting chain
Here are some basics steps to take note of when creating your starting chain for your blankets :
- Always check your desired pattern total stitch count and row count to ensure your blanket works to the required size.
- Different row counts are required for each blanket pattern size.
- See pattern information to determine row counts for your blanket size.
- Note some of my patterns include resizing information based on creating a size swatch, other patterns only include one size for blanket, take note of this in pattern information and notes as I do mention which patterns include resizing information and which don't.
- If you choose to use the foundation row technique you can skip the first row of written instructions and stitch diagram.
Starting Chain and Starting Row Tips
- Follow the foundation instructions:
- Begin by chaining the number of stitches specified in the pattern for your chosen blanket size.
- Work the foundation row as instructed:
- Follow the pattern’s foundation row directions carefully before moving to Row 1.
- Join new colors neatly:
- At the start of each new row, join your next color with a slip stitch (sl st) and work a single crochet (sc) into the first stitch.
- Use color joins for smooth transitions:
- For an easy color join tutorial, follow the link provided in your pattern.
- Track your row direction:
- Always begin the next row on the same side as the yarn tail from the previous row.
- Row direction tip:
- When turning your work, make sure the ending tail from the previous row sits on your right side — this helps ensure your rows alternate correctly and stay aligned.
Foundation Row Tips
- Loosen your tension:
- Keep your starting chain slightly loose to avoid tight edges that pull your blanket inward.
- Count carefully:
- Double-check your chain count before starting the first row, it saves time unraveling later!
- Use a larger hook for chaining:
- Going up one hook size for the foundation chain can help create a more flexible edge.
- One Color project - Add extra chains:
- Always include the turning chains, if you choose to stick to one color yarn (for example, chain 2 for half double crochet).
- Try a foundation stitch row:
- For a stretchier start, use foundation single crochet (FSC) or foundation half double crochet (FHDC) instead of a traditional chain.
- Check your width early:
- Measure your foundation row to ensure your blanket width matches your planned size before continuing.
Beginner Stitch Sampler Blanket Step by Step: Foundation Row
1. Start with the Foundation Chain
Chain the number of stitches required for your blanket size, based on the stitch count per row provided in your pattern or determined from your premade size swatch.

2. Begin the First Row
Chain 2 more stitches. Work 1 half double crochet (hdc) stitch into the 3rd chain from the hook. This counts as the first hdc of your foundation row.

3. Complete the Foundation Row
Work 1 hdc stitch into each remaining chain across the foundation row, including the last chain. Do not finish off the color.

4. Start the First Pattern Row
Chain 3 (this counts as the first stitch of the next row). From here, follow your pattern instructions to continue with the first row of your stitch sampler.
5. Check Your Stitch Count
Count your stitches to ensure the total matches the stitch count allocated for your blanket size in the pattern. This ensures your blanket will turn out the correct width.
How to Change Colors in Crochet
- Work the last stitch until the final yarn over.
- Drop the old yarn color.
- Pick up the new yarn color.
- Pull the new yarn through the final loop.
- Continue crocheting the next row.
Take note of Stitch counts in every row
It is always important to keep track of stitch counts when switching stitch patterns between rows.
Working a stitch sampler or any pattern where you have different stitches the best practice is always to know what your base row stitch is.
Example 1:
- You need to use 230 sts for the base row of your blanket ( pattern eg: 1 hdc st into each st of row )
- ( (1 st = Starting chain of row (ch2)) + ( 228 x 1hdc sts is the stitches your pattern repeats within ) + (1 st for the last stitch of your row ) = 230 sts
Example 2:
- You need to use 230 sts for the base row of your blanket ( pattern eg: sk1, *1 x 3dc, sk2 - rep until second last st, sk1 )
- ( (1 st = Starting chain of row (ch2)) + ( 76 x 3dc st repeats) + (1 st for the last stitch of your row ) = 230 sts
Example 3:
- You need to use 230 sts for the base row of your blanket ( pattern eg: sk1, *1 x 2dc, sk1 - rep until second last st, sk1 )
- ( (1 st = Starting chain of row (ch2)) + ( 144 x 2dc st repeats ) + (1 st for the last stitch of your row ) = 230 sts


Take note of skipped stitches in the pattern diagram and in the written instructions, For this example, we will reference rows: 11,12,13 of one of my patterns as shown in the image,
- Row 11, requires working 2 dc sts into 3dc sts of the previous row. which means row 11, requires 1 skipped stitch between 2 dc sts,
- In row 12, a 2dc stitch is worked in the space between each of the two(2) dc stitches of the row before,
- Always remember to chain 1 at the start of the row, and the 1 dc into the last stitch of the row.
- Example rows 11, 12 & 13 should have the same number of 2 dc stitches in every row.
Take note of pattern instructions in the beginning and end of each row
Follow the pattern repeat, as per the written instructions, and as indicated in the diagram, Some rows starts and ends differently.

For some rows an 1 hdc is indicated for the first two stitches of the row. You will skip the 2 last stitches of the pattern and repeat, at the end of the row, be sure you work the last hdc stitch of the row.
Crochet Stitch Sampler Bags
Stitch sampler techniques can also be used to create textured crochet bags and tote patterns. These projects showcase stitch textures while creating functional accessories.
Crochet Stitch Sampler Ponchos
Crochet stitch sampler ponchos combine multiple stitch textures into wearable garments, often arranged in horizontal stitch sections.
Crochet Stitch Sampler Scarves
Sampler scarves are smaller projects that allow crocheters to practice stitch patterns without committing to a full blanket project.
Learn some the Crochet Stitches Used in Stitch Sampler Patterns
- Chain Stitch Guide
- Double.Crochet Stitch
- Half Double Crochet Stitch
- Tulip Stitch Tutorial
- Wave Stitch Pattern
- Shell Stitch Guide
- V Stitch Tutorial
Visit my library for a full list of crochet stitches available on this website.
Crochet Stitch Sampler Pattern Collection
Explore these crochet stitch sampler patterns designed to help crocheters learn new stitches while creating beautiful textured projects.
- My Original Striped Stitch Sampler Afghan
- Ultimate Crochet Stitch Sampler Blanket
- Flower Stitch Sampler Throw
- Boho Crochet Stitch Sampler Poncho

Find more tutorials
Explore More Crochet Tutorials on the Website
If you need extra help while working on your stitch sampler blanket, you can explore the crochet tutorials section on the website. These guides explain crochet stitches, techniques, and pattern methods in a clear and beginner-friendly way.
You’ll find helpful stitch tutorials, visual diagrams, and step-by-step guides that make it easier to learn new stitches and improve your crochet skills while completing your project.
Here are some pattern ideas
Feel free to explore the additional sections of our website for even more crochet patterns, helpful tutorials, and creative inspiration.
Each section is thoughtfully organized to make it easy to find exactly what you’re looking for and to support you at every stage of your crochet journey.
Explore More Popular Crochet Patterns You’ll Love
If you enjoyed this pattern, be sure to explore some of our other most-loved crochet designs.
From textured granny squares and patchwork flower motifs to beginner-friendly blankets and statement afghans, each pattern is created with clear instructions, step-by-step guidance, and practical yarn details to help you crochet with confidence.
Whether you're building a full blanket collection, creating a thoughtful handmade gift, or simply looking for your next relaxing project, you’ll find plenty of inspiration across our popular pattern pages.
Take a look around and discover your next favourite crochet project.
You will find the full list of crochet patterns on the Crochet pattern collection page.
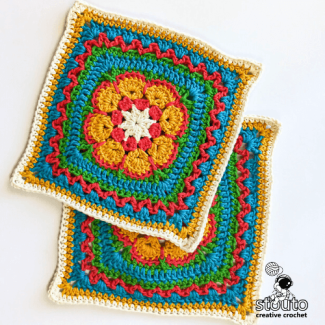
8 Petal African Flower Crochet Pattern – Easy 9 Inch Large Square
Looking for an 8 petal African flower crochet pattern that’s both eye-catching and easy to make?
This design transforms the classic African flower motif into a large 9-inch square, making it ideal for blankets, afghans, cushion covers, and statement crochet projects.
With clear stitch rounds and strong petal definition, this African flower square works up beautifully in solid colors, bold contrasts, or scrap yarn combinations. Whether you’re a confident beginner or an experienced crocheter, this pattern is designed to be enjoyable, flexible, and visually striking.
